
We can Stock ROM using SP flash tool. Here I’m explaining how to stock ROM using SP flash tool. Before that let us look at the brief information on Stock ROM, Custom ROM and what are all its differences. Follow the procedure given by me step by step. I have tried to explain everything in a clear way that a novice too could understand what to do and what is happening. But as every techie warns us before their instruction let me also warn, “Try this at home at your own risk”.
Why to Stock ROM?
We may have changed our ROM from Default android version to some other custom ROM and then feel irritated or insecure with those custom ROM and rush to come back to our Stock ROM or some of us may have upgraded from Android Kitkat to Android Lollipop with a joy and don’t know how to come back from Lollipop to kitkat after feeling the terribleness in lollipop ROM.
What is the difference between Stock ROM and Custom ROM?
There are two types of Android OS. Stock ROM and Custom ROM. Where Stock ROM is one which was developed by the manufacturer of the device itself. So the Stock ROM is the default ROM of the device and Custom ROM is where an extra ROM which can be flashed in the device which has required configuration.
Procedure for how to stock ROM using SP Flash tool:
Step 1:Download SP Flash tool and Stock ROM and Extract both of these files.
Step 2: Install ADB toggle in your android mobile. Open the application and Turn on usb debugging on device. Software is available in : http://adbdriver.com/downloads/ (Download ADB toggle from our server)
Step 3: Connect your phone to pc and run ADB Driver Installer software and install drivers. Software is available in: http://adbdriver.com/downloads/ (Download ADB Drivers from our server)
Step 4: Power off your Android Smartphone and remove the battery if it is removable battery.
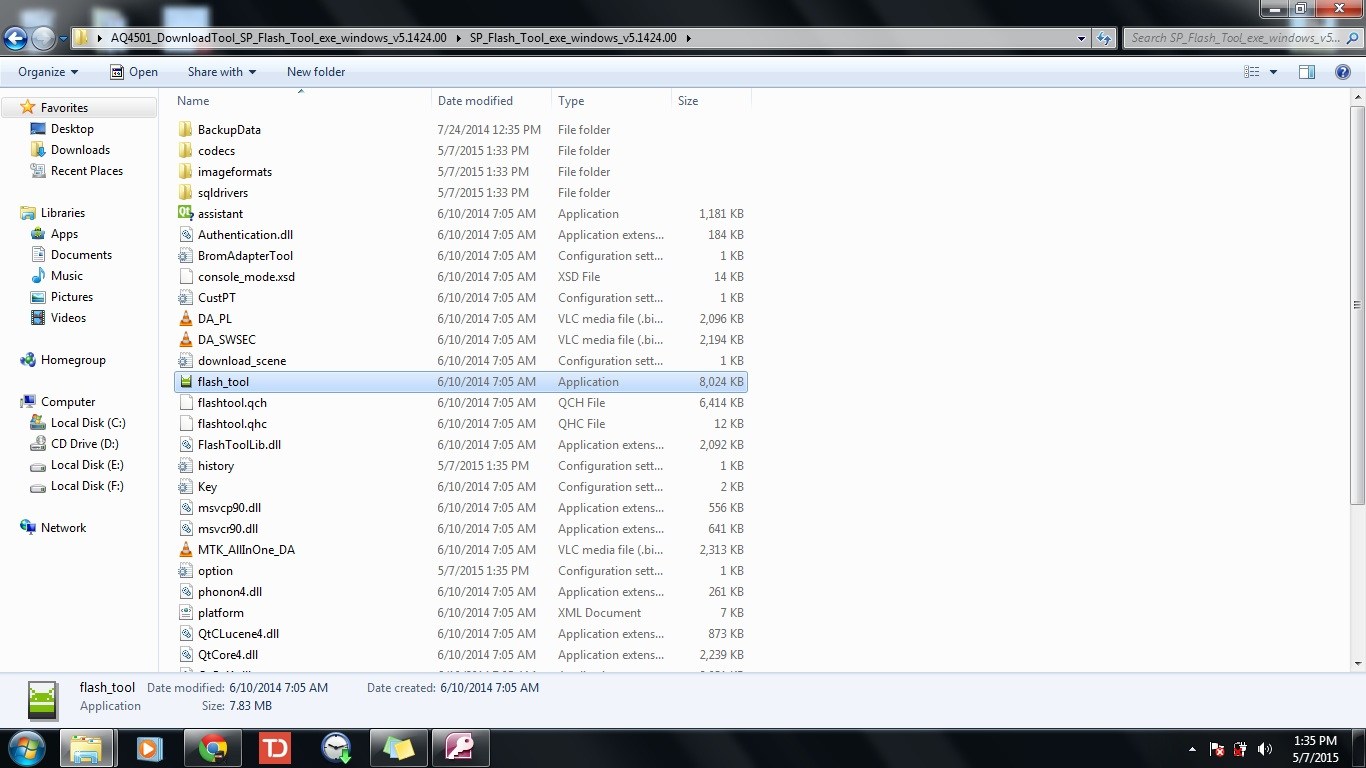
Step 5: After extracting SP Flash tool folder open flashtool.exe file as shown in image below
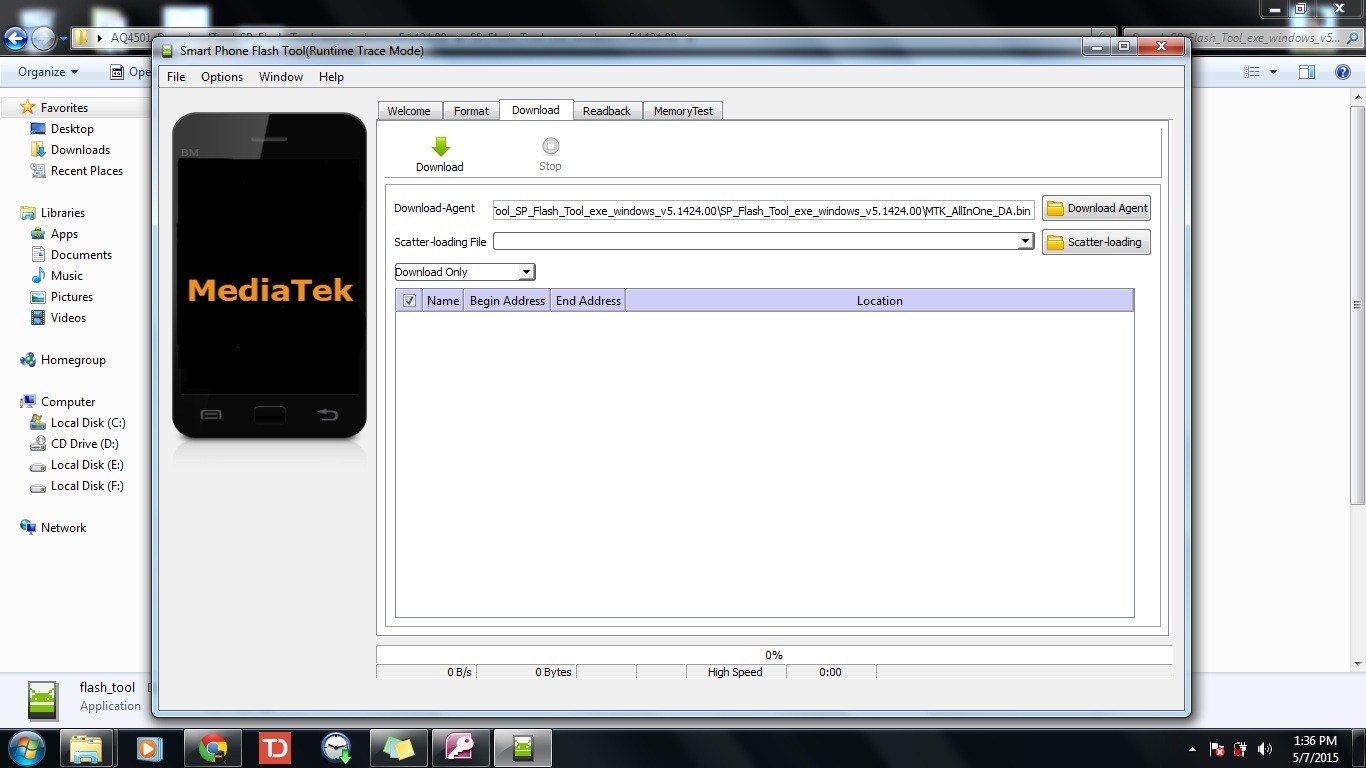
Step 6: once the Smartphone Flash tool (SP flash tool) is launched. click on scatter-loading button as shown in the picture
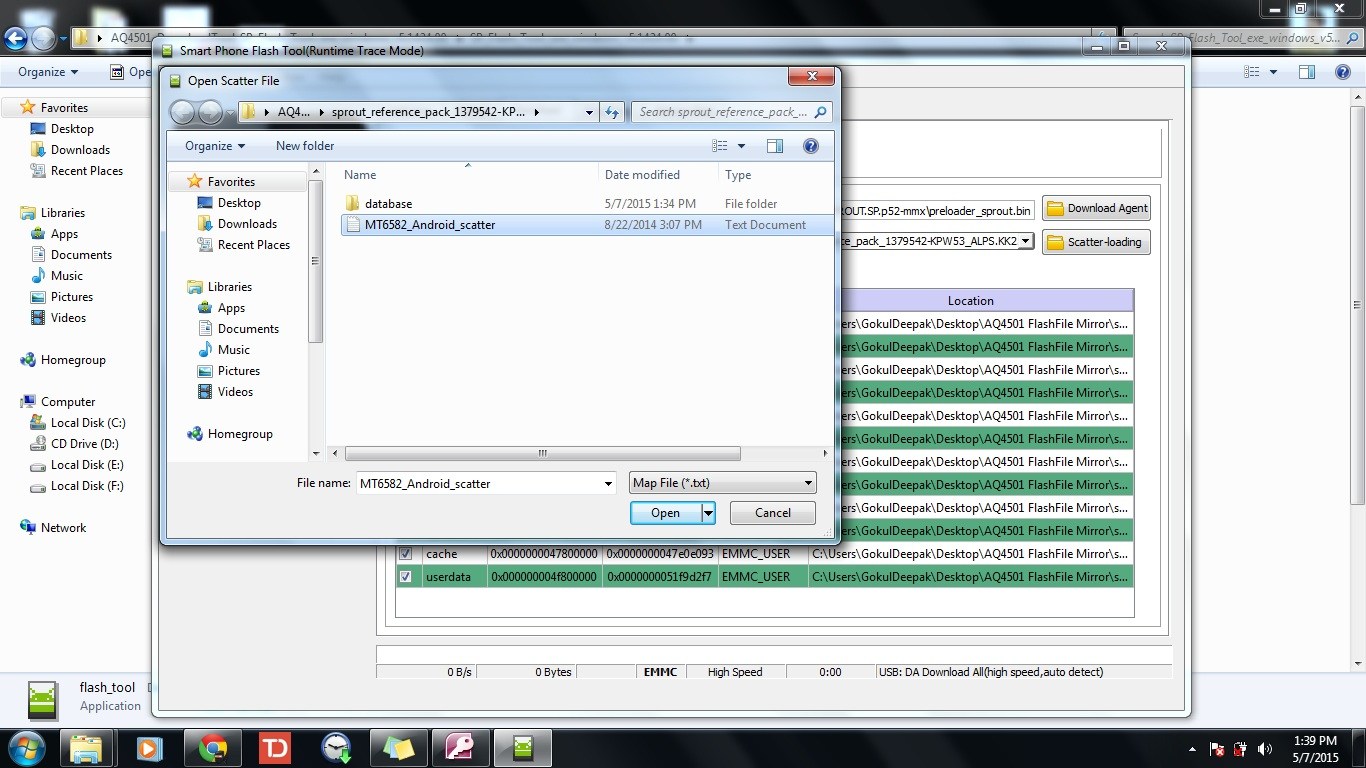
Step 7: Now a new window will appear to browse for files. go to extracted Stock ROM folder and any .txt file as shown in the picture below. as this is the scatter file the name of the file even contains the Same word so choose that scatter file.txt and click open.
Step 8: Now click on Download button in the SP flash tool.
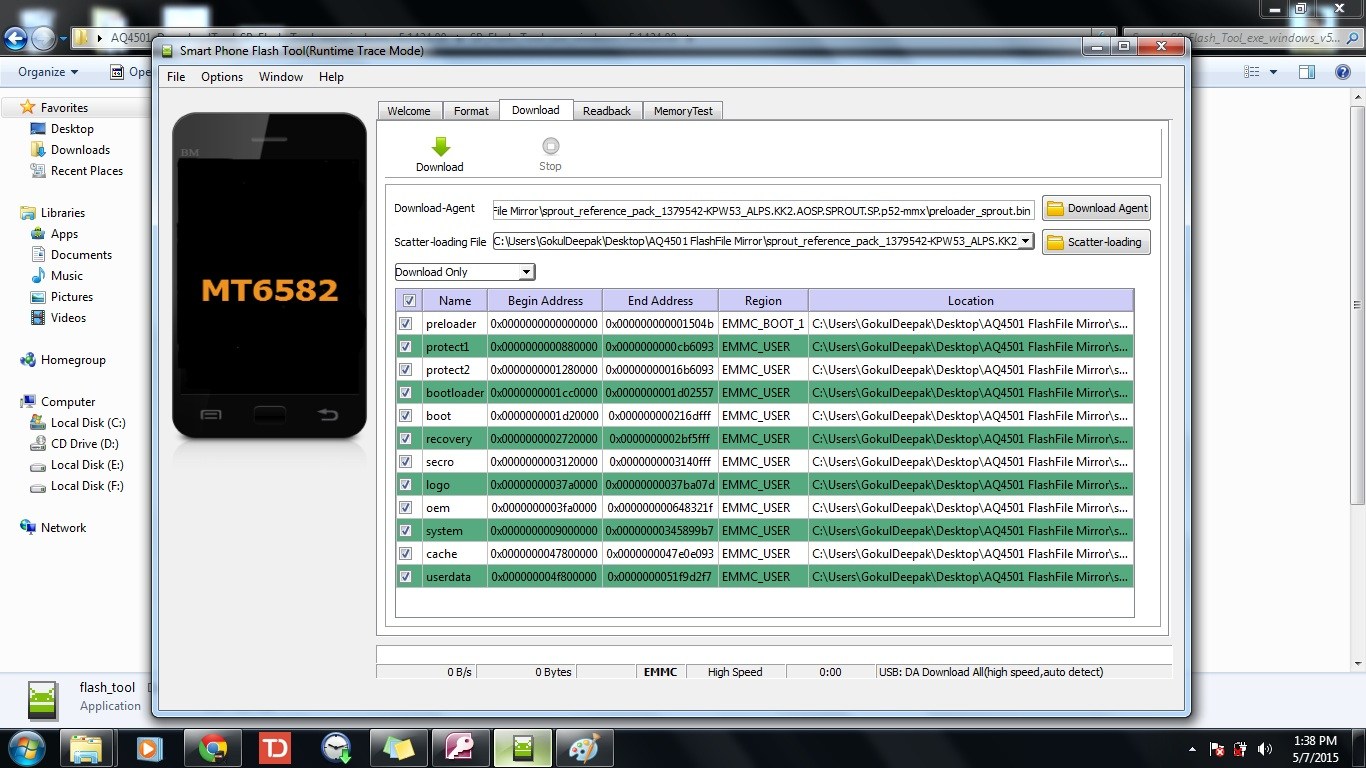
Step 9: Now connect your Android mobile with the computer after removing battery from it. if it does not has removable battery then no problem with that too. After connecting press volume up or volume down button so that computer may easily detect the phone.
Step 10: Once if the download is completed a small window with green circle and ok will appear
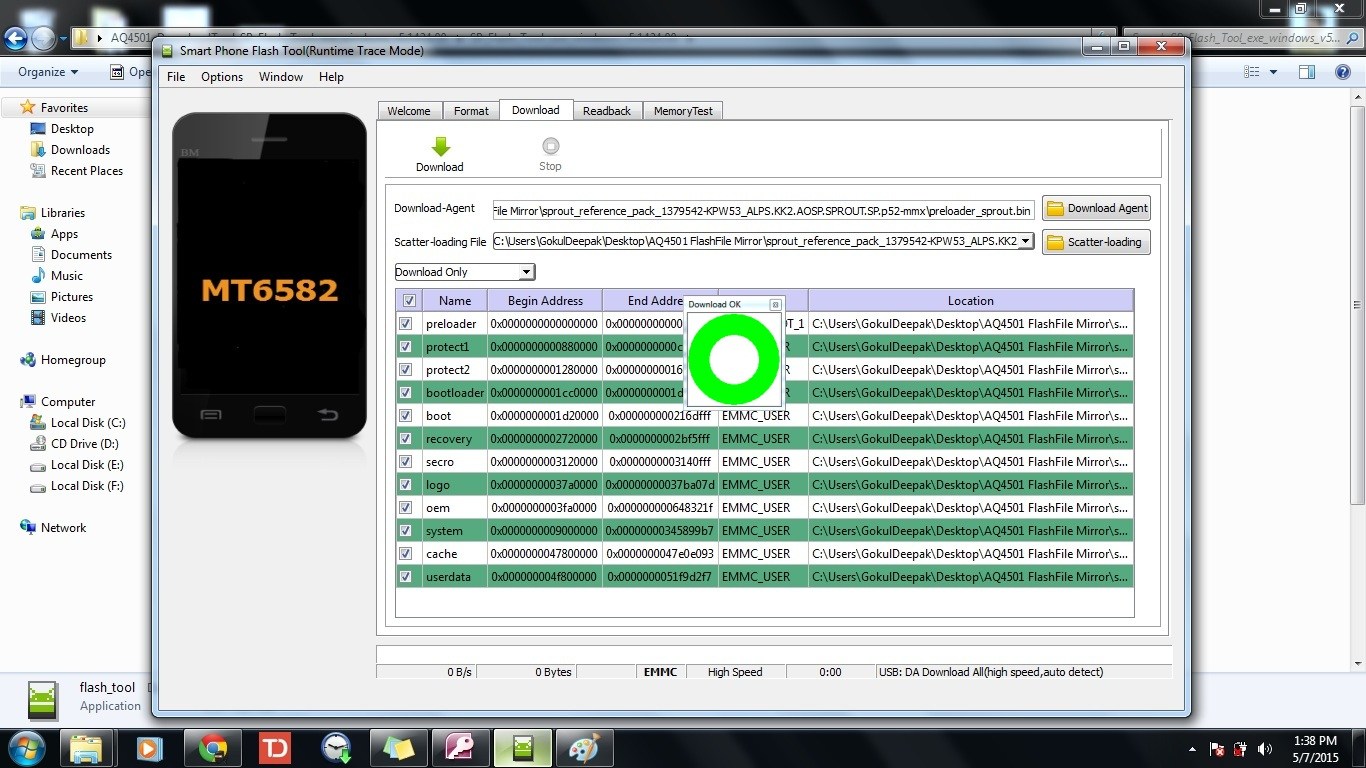
Step 11: Close SP flash tool application and disconnect android mobile from the computer.
Success: Now we had successfully installed the Stock ROM.
You May Also Like:
- Lollipop to Kitkat in Micromax Canvas A1
- How To Root Micromax Canvas A1 (Android One)
- How To Install CM 11 (Cyanogenmod 11) in Micromax Canvas A1

Hey… Can anyone help me out. I tried to flash my ROM with the above method but since the phone has unremoveable battery (lava iris x8) instead of detecting and downloading the phone shows up with charging indicator and also when i press volume down it boots up to factory test mode. So do i flash the ROM now.
Search for iris x8 stock ROM and a flashing kit. Then Just go to bootloader and execute mfastboot commands.